 Ok, so I like to think of myself as kind of creative. In other words, I have a couple of crafty bones in my body, however, I am the first to tell you that I am not an artist. I can’t draw and I can’t paint for the life of me. I definitely don’t think I could do something as artistically driven as decorate a cake and have it look professional. Well, that is until I saw this awesome DIY cake by Wild Orchid Baking Company on The Wedding Chicks. It is very reminiscent of my Poof Balls, which of course makes me love it even more! I wish I could get married again so bad. I could do that shit on the cheap this time fo sho! Check out how to become and cake artist…
Supplies
- Fruit leather (We used store bought for this project. If you wanted to match a specific color, then making your own might work better for you.)
- Round cookie cutters
- Small bowl of water
- Small paint brush
- Floral wire (tooth picks or skewers would work as well)
- Piece of foam
Directions
The Flowers:
 Step 1. Using a round cookie cutter, cut circles out of the fruit leather. The size of the cutter you use will determine how large of a puff you have at the end. For these puffs we used round cutters that were 1/2” to 2” in diameter.
 Step 2. Pick up a fruit leather round, and using your thumbs and forefingers, press the sides of the round together towards the center of the circle. You’ll end up with a shape resembling a ruffled “x”. Just be sure to press towards the center of the circle, so that you don’t close the “x” entirely. The open loops are what give the puff it’s shape.
(Repeat with other circles. For a nice full puff we used 6 fruit leather rounds per puff. You can use more or less depending on how full you’d like the puff to be. To begin to form a puff, press 2 of the ruffled fruit leather rounds together at their points.)
 Step 3. If the fruit leather has begun to dry out, brush on a small amount of water so that they stick together. Add more ruffles until you achieve the desired puff shape. Set formed puff onto a piece of styrofoam. Use floral wires or tooth picks to prop up the fruit leather puff into it’s desired shape. Allow to dry out over night. Using the wires or toothpicks helps keep the puff from drooping or loosing it’s shape as it dries. You may need to allow puffs to dry out longer depending on the humidity.
The Small Circles:
 Step One. Add dots to your cake or cupcake design by cutting out small circles from the leftover fruit leather. Apply using royal icing or water, just like the puffs.
 Step 2. Apply to a finished cake using small dots of royal icing, or if applying to fondant just brush on a small amount of water where you’d like the puff to stick.
 For cupcakes: Set onto freshly piped frosting.
Notes: How easy is that? I wish I could get married again or at least one of my girlfriends so I can make this. Can’t find fun fruit leather colors? No problem. Make your flowers out of tissue paper, like Martha Stewart’s Pom Poms. Who says the flowers have to edible?
- Source: The Wedding Chicks
- Cake: Wild Orchid Baking Company
- Photography: Mark Davidson
 Wow, that might be way too much food for 4-5 people… Hmmm I may have to pare it down a tad. We already have the wings, so they are a for sure. I am thinking a 7-Eleven Layer dip and the spinach dip will go nicely. Maybe I will make the whoopie pies for dessert. If not, I have a cake mold in the shape of a stadium… I might have to make an actual Super Bowl cake. What do you think? I am thinking yes!

 1. Anchors Away Welcome Wedding Tote: Go to
  My Wedding at a Glance
 I knew I wanted my dress months before I ever put it on. It was love at first sight and could not imagine wearing anything else, considering everything else in the wedding was centered around it. The invitations, the cake, the flowers, everything was inspired by my beautiful flowered skirt wedding gown. It was designed by
  When it comes to jewelry, I am a minimalist. I am not one for necklaces or pearls. I decided to wear an old pair of clip on costume jewelry earrings that of course mimicked the roses on my dress. For my bridesmaids, I wanted them blinged out. They all wore beautiful (fake) diamond encrusted earrings, necklaces and cocktail rings to match their blinged out dresses. For shoes, I wanted all of us to match, so my girls wore a black pair of close toed heels and I wore the matching pair in purple of course. I even got my Hubby to wear a pair of pink and purple socks. Lets just say I pay a little too close attention to detail sometimes. I also had a fabric flower in my hair that I had made special by a friend to match my dress. When the bridal party got to the reception, the bridesmaids were given pink parasols to use for our grand entrance. Instead of a normal bridal party entrance, where everyone is introduced and usually tries to do something funny, but ends up being too long and little awkward, we decided to hire a jazz band and do a Second Line into the room. It was perfect, because it fun and upbeat and definitely got the party started on the right foot. Plus we got to use the parasols as the perfect backdrop for our kings table. Halfway through the night the Hubby and I did a costume change for our first dance. We danced to “Time Of My Life” and did the choreographed dance from Dirty Dancing. I wore a short white dress with Mary Jane dance shoes that I stuck little Swarovski crystals all over. It took about 4,000 crystals and weeks to finish, but it was so worth it. Totally adorable! For our toasting flutes we used these awesome mason jar wine glasses. It was a touch of my country girl soul poking out of a very elegant affair. Thanks to my in-laws for those.
 My brooch bouquet was possibly my most favorite thing about my wedding, except for my dress of course. My mother in law made it for me to use at my rehearsal dinner, however, I loved it so much I decided to use it for the actual wedding. It was far too beautiful, both inside and out, to be wasted on the rehearsal. Along with her beautiful brooches, she got all the important women in my life to add to it. It is absolutely amazing, and I will cherish it forever.
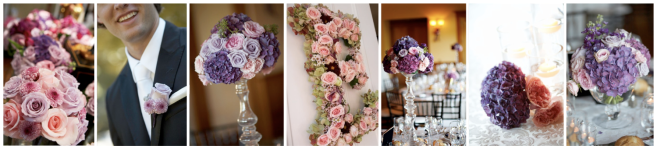 Obviously I did not need any flowers, thank God, because I wanted peonies, but I got married in late October, and it is very hard to find peonies in October. Somehow my amazing florist, Jeeryn of
  As I said the invitation was totally inspired by how it mimicked my wedding dress, but I fell in love with fullness that the purple gave the pink. Originally I wanted a pink and green wedding, but after I saw this gorgeous invitation suite by Sarka, of
 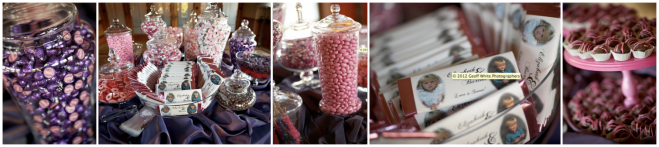 We had the most amazing favors. Not only were they adorable and useful, but there was a very special meaning behind them. My Hubby asked me to marry him while playing cards with my family. He discarded a joker with the words, “Will you marry me?”, written on it. It was perfect. So for our wedding favors, we had personalized decks with our picture on it made. We also had a pink and purple candy bar, which served as both decoration and favors. I made personalized Hershey Bar wrappers with our pictures on them and Hershey Kiss labels with our names on them. I know what you are thinking… And yes, I glued about 500 Hershey Kiss labels the week before the wedding.
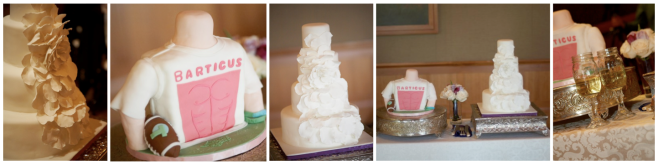 I am not a cake person, but I loved everything about my Wedding Cake. Even the way it tasted, which is surprising. I did a little something different for my cakes. I decided to have a fake Wedding Cake made, that had one real pink lemon flavored layer for us to cut at the wedding. The rest of the cake was made out of styrofoam. We then had multiple flavors of sheet cake in the back that we used for serving. This worked out great, because they not only was it cheaper, but I got to keep the top styrofoam part of the cake and have it on display in my house. It gives a whole new meaning to the tradition of saving your wedding topper. We also had a Groom’s Cake. If you are not from the South, you might not know what that it is. In the South it is very common to have what is known as a Groom’s Cake. It is usually a fun flavor like chocolate or red velvet, and it tends to be decorated in a way that represents the Groom. Both of my cakes were made by Venus, of
 All this talk about the ladies, I almost forgot about the dudes. Yes, guys can ask their buddies to be their groomsmen in fun and creative ways too. It does not have to be girly to be DIY. There are many manly, yet still unique ways to ask the boys to be a part of such a special day. One of my faves was created by Stephanie, of
  What was that ladies… You like beer too? No problemo! The Wedding Chicks have got the chicas covered as well. Print out your own
  When it came to asking my wonderful friends and family to be a part of my wedding party, I wanted it to be special. I didn’t want to just call them up and ask, or take them to lunch where they would totally know what was up. I wanted them to be surprised and feel very special. Plus I wanted them to have a keepsake they could have and remember forever how I asked them… Ok ok ok, I also wanted them to be totally impressed with my awesome DIY abilities.


